|
|
Beovision MX 7000 DIY Videogame TV Rack Cabinet
posted by Kaneda – on Sun. 24.January 2016
|
|
 |

If you ask me, the TV RACK of your game corner takes by the way more important role as many gamers might think. I am really sick of thouse IKEA furniture bullshit I see everyday on the internet. If you wanna do it like a PRO, then make your own RETURO-GEMU-TEREBI-CABINETTO!
Part 1 - the idea
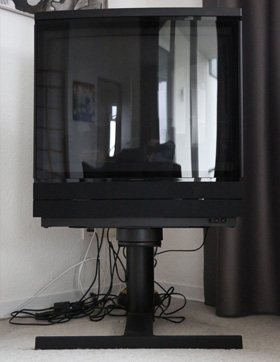
Last year I got the Bang & Olufsen MX7000 TV for my retro video game consoles for about 30€ on the internet. It was in almost new shape and it came with a motorized stand. This CRT has a really good tube and also a really nice sound system build in. The audio system consist of 2 low frequency and 2 high frequency speakers including a powerful amplifier, that makes a bumbastic surround sound. Gosh, I could continue to talk about this TV set more, but it is not the main topic of this project, so I will shift this to an other review about that particular TV later. I am quite sure, that I will keep this TV for a long time and will play my old video game consoles on this one until it fall apart. OK! So the idea I had, was to made a small and compact TV-rack for my retrogame corner, that looks nice and stands out with it own unique design. Finaly, I could have hooked up many consoles via SCART to a TV at the same time. To switch between the consoles I will use a scart switch box, that I also planing to make after I finished this project. I also wanted to keep the TV on the original turnable stand. The last point will make all more triky ... |
|
Part 2 - the concept and drawings
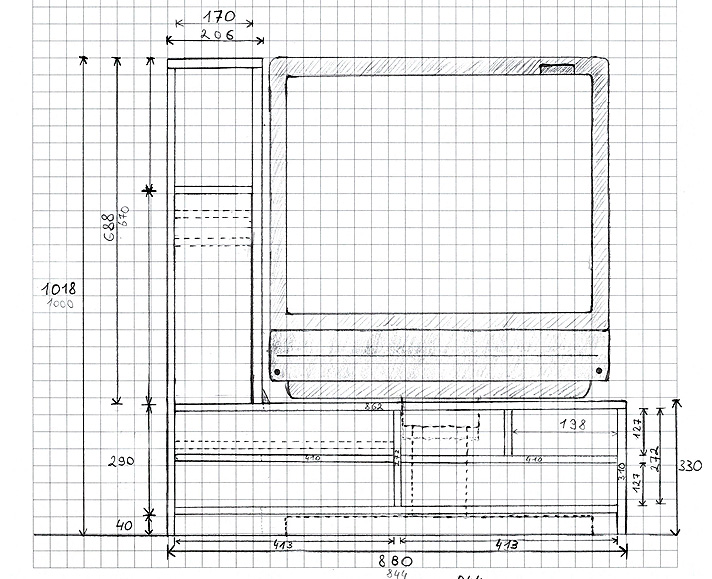
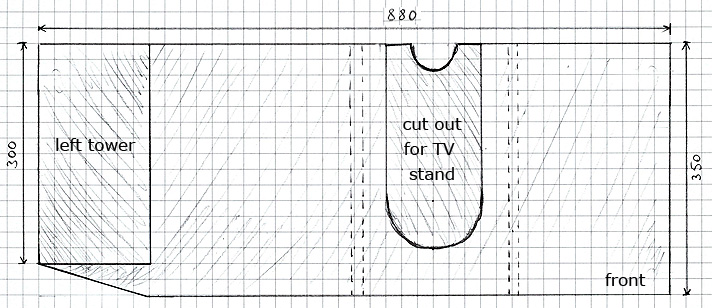
The main idea behind this, was to keep the TV at it original stand that can be rotate to any direction via remote. I imagined how I want to put each video game console in to a rack, because since PS2 (in Europe) there also a posibility to put the console verticaly. This would save some space horizontaly and its possible to make the rack more slim. This gave me the Idea to make the rack on one side going up to the top of a TV and make it look like an "L" letter. As for now, my TV stands at the room corner, but later I could put it between two book shelfs. It would also make a nice appearance this way!
Part 3 - choosing the material
There would be obobviously a wood, but what kind of? The material has to be heavy and solid, because the left side of the TV-rack is going to be tall. If it would be made out of light material, it will be apparently unstable and you could easily tilt it or even throw it down. Also, I wanted to give it kind of the same look, as my other forniture in a room. Thats why i choosed bleech wood. Its really stable, heavy and solid sort of tree, but it also a hard to work with. Luckily, the DIY-Market, I got the material from, offered a cut service. Not for free but the price for a m3 was the cheapest there. Also I have no possibility to cut such a hard wood by myself.
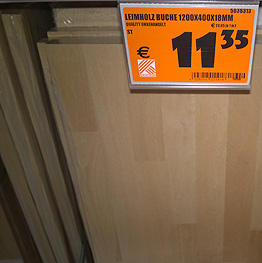
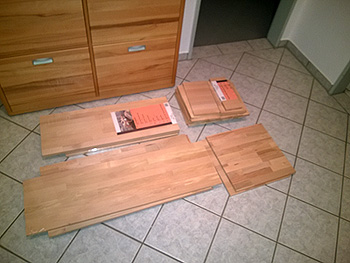
cuted bleech from the DIY-Market.
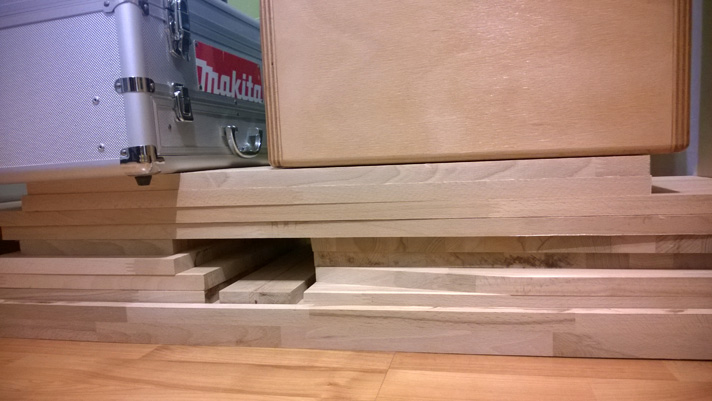
After unwrapping, you must put all wood under weight in a dry area for a week or two!
Keep in mind! If you don't do it, the flat material could distort during it dries.
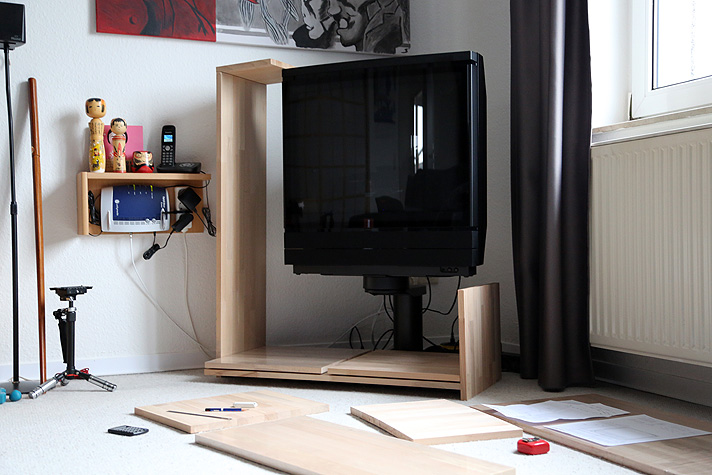
Trying to imagine how it will looks like
Part 4 - drill & assembling process
At the beginning I wanted to assemble the whole cabinet without any metal part. This would take much more time to made it and that would also mean, that I had to use a glue. Disasembeling would be not an option at all. Thats why I choosed to use the forniture connectors, as I already did on my other TV-Rack project.
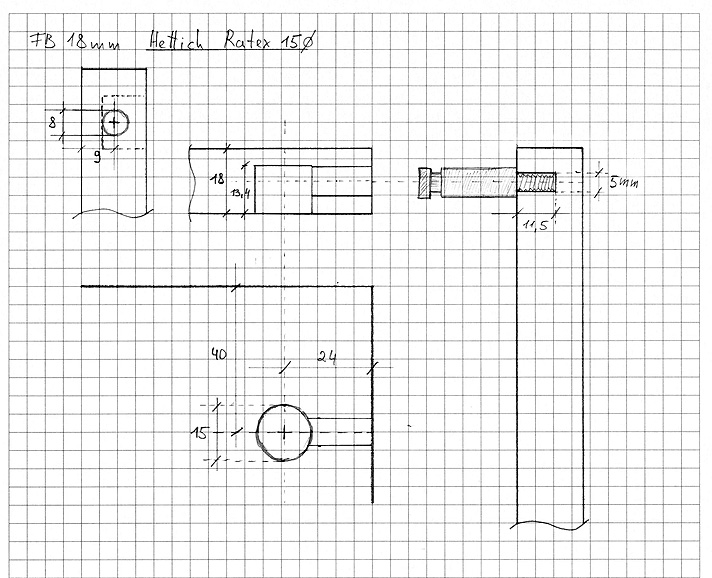
Drill instruction for the Hettich Rastex 15mm series
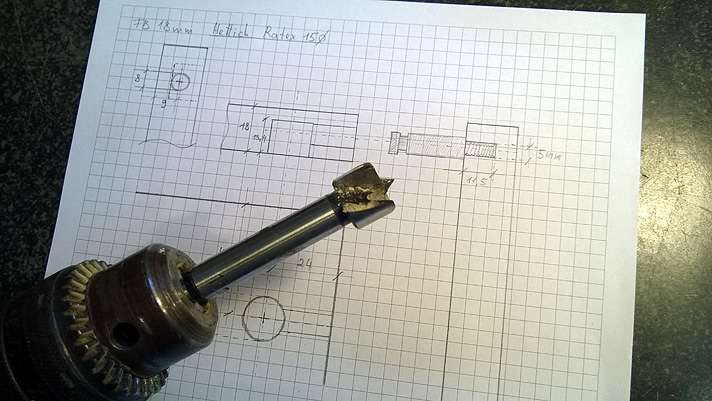
Get ready for a drill ^_^
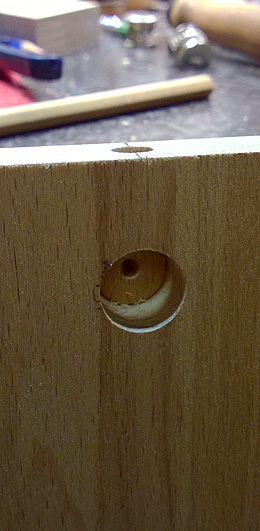
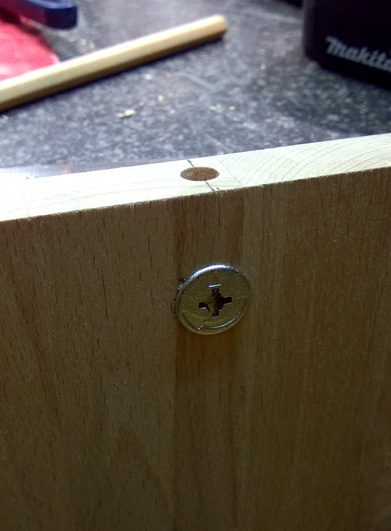
Drilling two borehole for the Hettich Rastex system in to a bleech tree is a hard procedure!
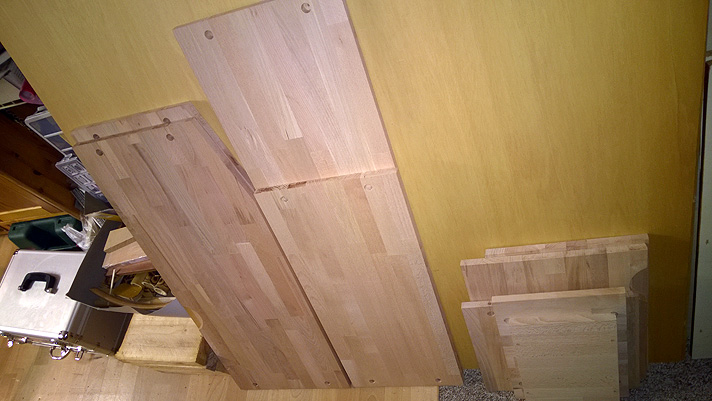
All done! Now going to put them all together! Hopefully with no bad surprises :D
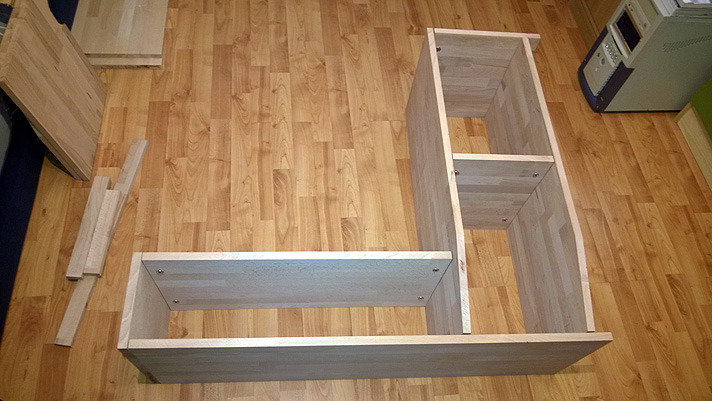
First assembly on the floor. It all went smooth, no physical stress on parts, nice!
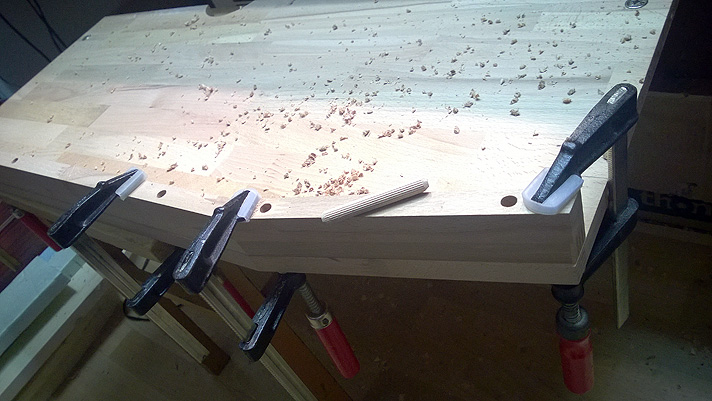
Attaching the edge plank
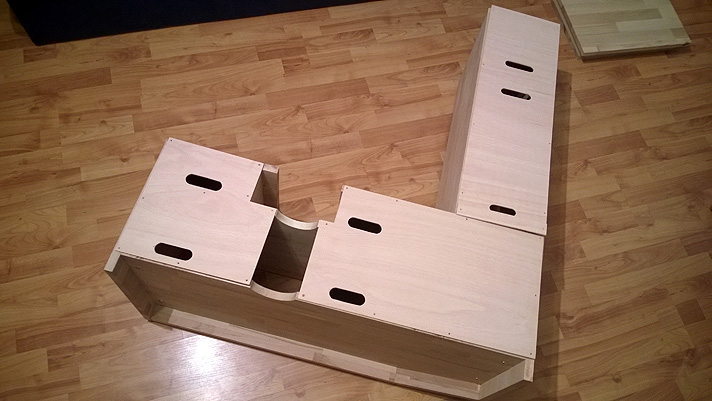
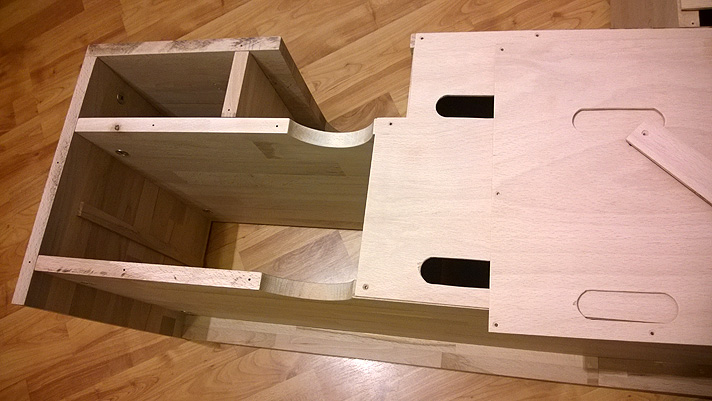
Rear plates splitted to three separate parts
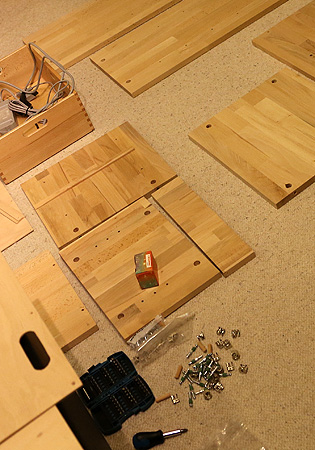
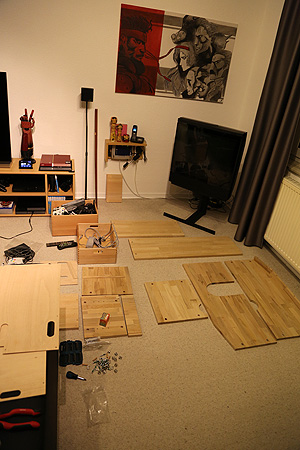
Single parts are waiting to be assemble to the whole thing together
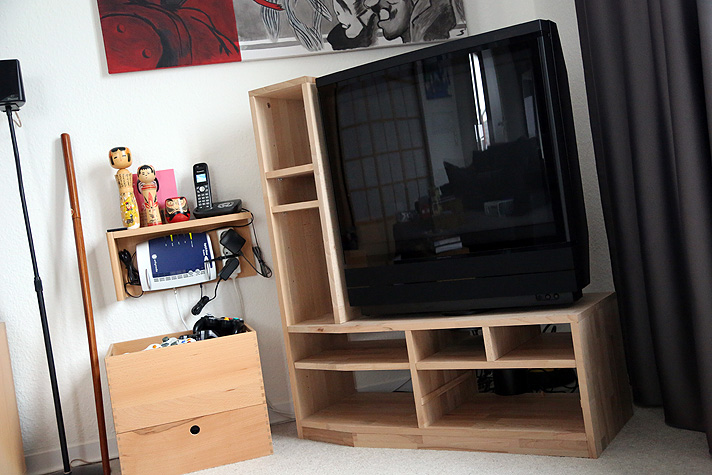
Assembled but the rear plate is not attached yet
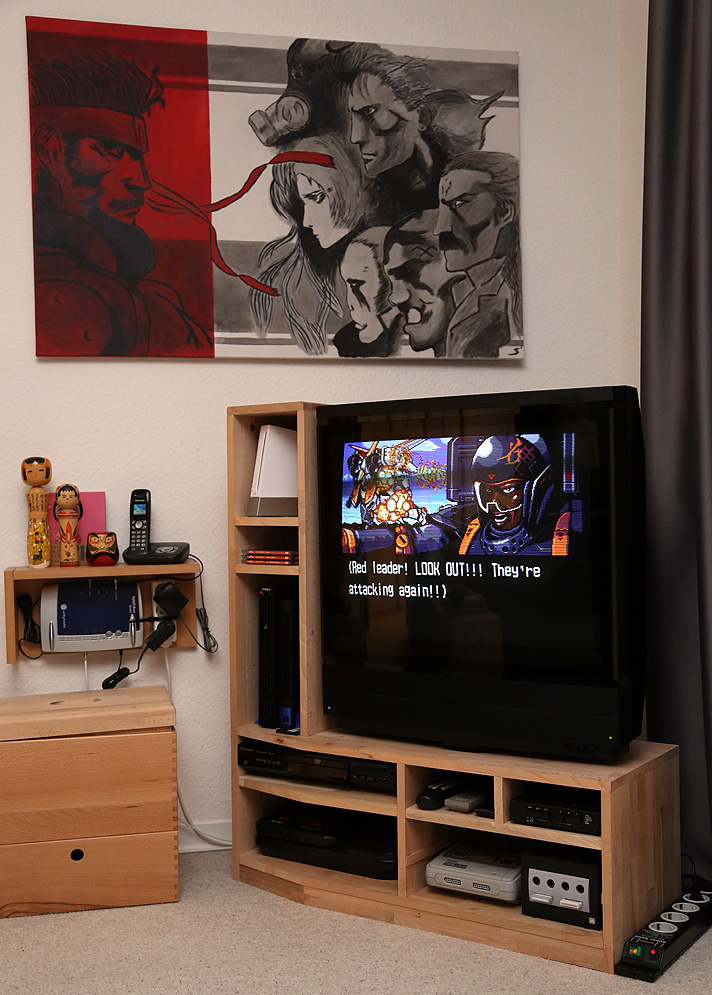
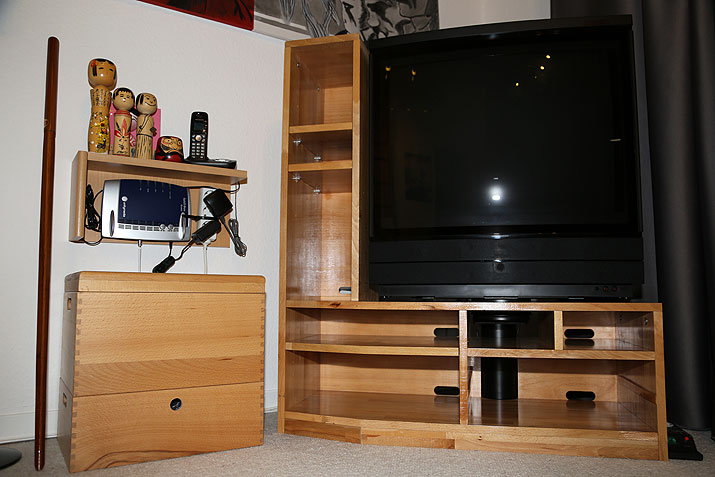
Fully assembled and ready for gaming!
TV set is still standing on it stand and can be rotate to each side via remote or manual
The cabinet is finished for now, but I am still thinking, "should I put a varnish on it, yes or not?"
If you got interested in the MGS painting on the wall, check out my painting review about it

UPDATE* 2016.10.05
I asked my dad to put one layer of wood varnish on each single part and he put three of it!
Now check out that glossy look! Also the color is much darker now.
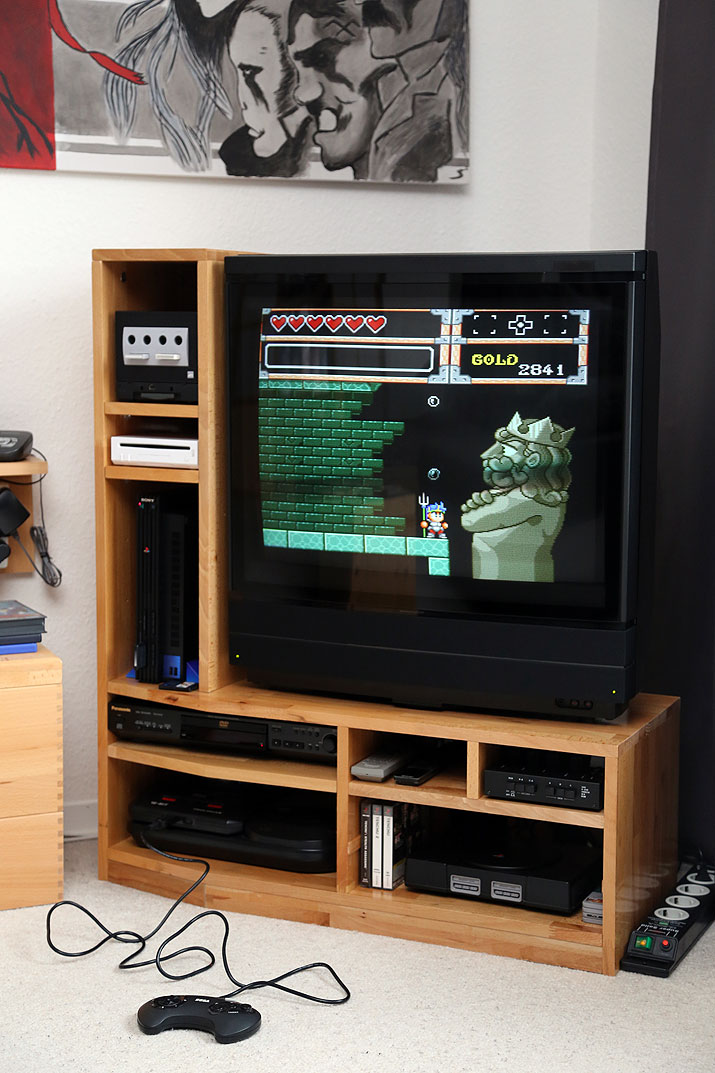
Can you guess what I am playing?
.
.
.
.
.
TIMECAPSULE ❤️ UPDATE* 2024.03.23
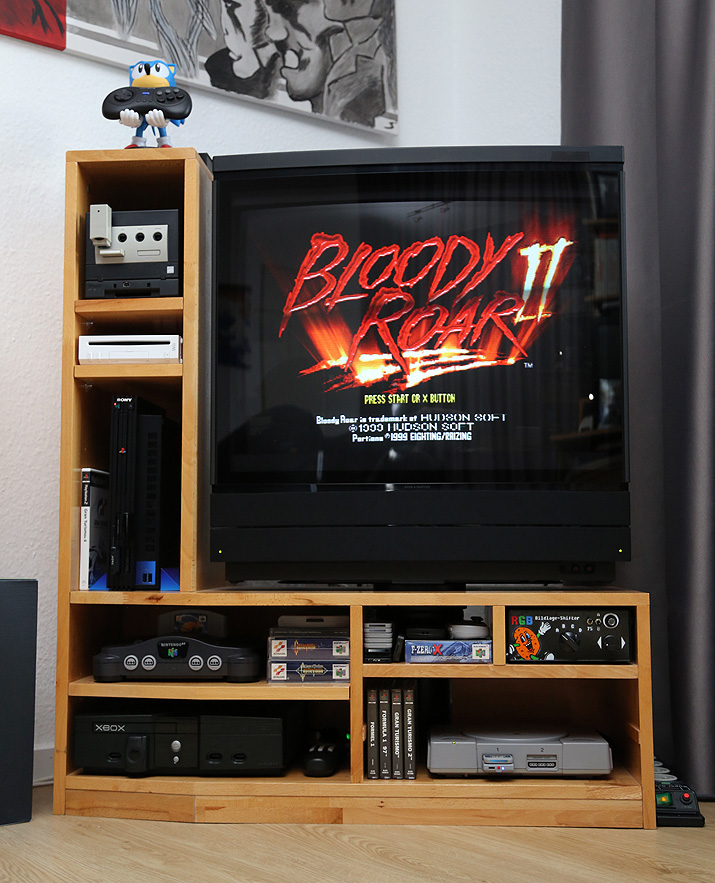
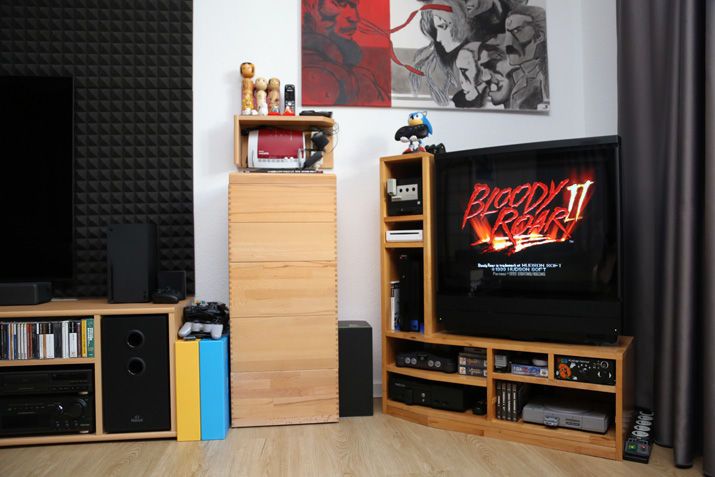
8 years since I made this tv-rack has passed! It is a timeless, compact, all-in-one retro gaming center!
|
 |
| | « back to topic |
| |
| 8 comments to Beovision MX 7000 DIY Videogame TV Rack Cabinet |
| |
| solderchicken ~ on: 14.03.2024 at 19:41 |
 |
| | Superb mate! Really top work. I have two of these TVs with motorised stands. And an MX4000 too. Love these TVs. Well done. 👍 | |
 |
| |
| Kaneda ~ on: 15.03.2024 at 09:04 |
 |
| | Thanks mate! | |
 |
| |
| Paul ~ on: 18.03.2024 at 09:03 |
 |
| | Great work ! Hope it's still in use, would love to make the same cabinet for my beo, but I don't have the gear to make it...
I can guess that you were playing wonderboy ^^
Have a great day
| |
 |
| |
| Kaneda ~ on: 18.03.2024 at 22:30 |
 |
| | Thanks! Yes! it's Wonderboy in Monsterworld. And yes it is still in use almost every weekend. I will post a photo of current setup this weekend (ノ◕ヮ◕)ノ*:・゚✧ | |
 |
| |
| Paul ~ on: 31.03.2024 at 12:32 |
 |
| | Hey thanks for the update !! Nice to see it's still in use. In the months to come I'm planning on making the exact same rack as you but with another shelf on the right and with a different motorized stand than you on my mx7000. Will probably update here if it becomes official !!
Thanks for the concept, have a great sunday | |
 |
| |
| Kaneda ~ on: 04.04.2024 at 18:45 |
 |
| | Thanks mate! Yes, definitely show us your build! | |
 |
| |
| Robert Rauff ~ on: 02.12.2024 at 22:59 |
 |
| | Great work! Pardon my ignorance, but are the original measurements in mm or cm? I am looking to build this myself for my retro game consoles! | |
 |
| |
| Kaneda ~ on: 03.12.2024 at 09:28 |
 |
| | Hi Robert, yes all in mm! Sorry it was just a sketch, not a real drawing. | |
 |
| |
|
|